How To Install a Resin Bound Driveway
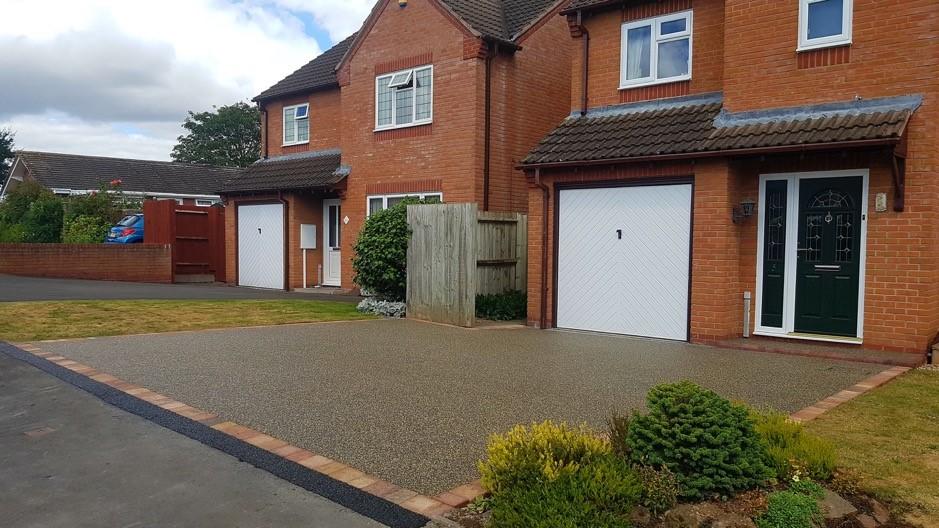
Resin Bound is an attractive and low maintenance surfacing option which has numerous advantages over traditional driveway surfaces. However, to ensure the successful installation of a Resin Bound surface, it is important to follow the installation procedures correctly.
This guide highlights the key steps to be followed when installing a Resin Bound driveway. The method shown here can also be used for other projects such as resin bound paths and patios.
DALTEX is the UK’s number one brand in Resin bound and as the manufacturer of the DALTEX Performance UVR System, these manufacturer guidelines specify the recommended mix design to ensure an installation of the highest quality which also meets BBA approved standards.
What is resin bound?
A Resin Bound system creates a smooth, uniform surface by combining resin with specially selected dried aggregates. The mixture is then applied to a new or pre-existing macadam or concrete base by trowelling.
A Resin Bound system is permeable. This characteristic makes it a Sustainable Urban Drainage Systems (SUDS) compliant solution ( as long as a suitable sub-base is installed).
What can Resin Bound be used for?
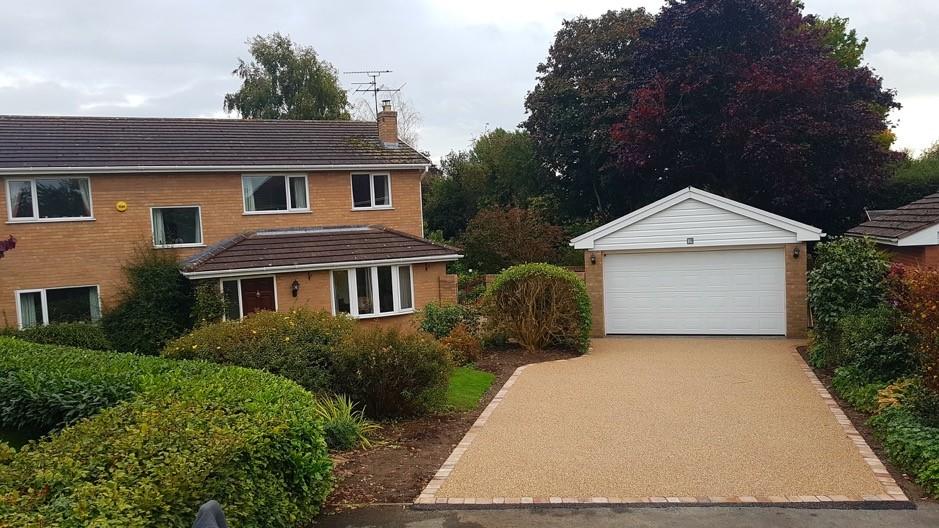
Resin Bound is extremely versatile and can be applied to a variety of surfaces, including:
- Driveways
- Pathways
- Patios
- Parks and Gardens
- Concourses
- Parking Lots
- Bicycle Paths
- Terraces
- Bridges
- Educational Facilities
- Towpaths.
Recommended Resin Bound Mix Specification
At Derbyshire Specialist Aggregates, we recommend 7.5kg DALTEX Performance UVR Resin. Through research and experience, we believe having the correct ratio of resin to aggregates is critical to achieving a lasting, durable surface and we recommend the following amounts of aggregates.
- 3 bags 2-5mm standard bags
- 1 bag 1-3mm aggregates
- 1 mini bag of binding quartz
- % resin 7.05%
- Coverage approx. 3.55m² at 18mm and 4.0m² at 15mm.
- 3 bags 2-5mm aggregates
- 1 bag 1-3mm aggregates
- 1 mini bag of binding quartz
- % resin 6.9%
- Coverage approx. 3.13m² at 18mm and 3.6m² at 15mm.
We recommend that a minimum 18mm depth be used. For areas with foot traffic only, a minimum depth of 15mm may be used. This is so the surface achieves the required tensile strength for the application. Binding quartz increases the strength of the Resin Bound surface and will contribute to the anti-slip properties of the finished surface.
The surface should be installed to a minimum of 18mm for driveways. For areas with foot traffic only, a minimum depth of 15mm may be used.
In the past, a mix of 6.5kg kits with 100kg of stone was used. Tests have shown this resin/aggregate ratio does not contain enough resin and may have resulted in poor performance with some aggregates.
How to calculate the amount of dried aggregates you need
Ordering the correct quantity of aggregates is important to prevent waste or the need for additional orders. DALTEX has a Resin Bound calculator that is free and easy to use.
Before you start installing a resin driveway
You must also consider the following before you begin
- Is the surface suitable?
- Is the base stable?
- Is there any cracking in the surface?
- Is there any damage?
Pre-installation: Preparation
The surface must be free from contamination or water prior to application, as such cleaning/drying may be required. The ambient temperature, relative humidity and ground temperature should be tested and recorded prior to and during application.
All substrates to be coated should have a surface temperature at least 3°C above the dew point and rising to reduce the risk of delamination due to condensation or surface foaming of the system.
What bases are suitable for a resin driveway?
A Resin Bound system base must be stable and suitable for the load it is expected to take once completed. A suitable Resin Bound base could be tarmac, asphalt or concrete. Suitable bases for a Resin Bound system include the following:
- Macadam
- Asphalt
- Concrete.
You can find more detailed information about what bases can be used for Resin Bound Systems and the correct base course requirements in our Knowledge Centre.
Final checks before installing a resin driveway
Before getting started with the mixing process, it is important that you make the following checks:
- Rain: Do not attempt an installation if rain is forecast during or within 4 hours of completion. We recommend having a reliable weather app on your smartphone.
- Surface moisture: Use an outdoor hygrometer to check for humidity. If the humidity level is below 80%, it is okay for working. If any higher, you may need to delay the project.
- Surface checks: Make sure the base surface has been primed and dried.
- Materials: Check your aggregates and other materials for quantity, batch and colour.
- Check area: Re-measure the work area to ensure you have all the materials you need to complete the project.
- Clean and prepare equipment: You will need to make sure all your equipment is clean and ready for use.
- Edging tape: Make sure all edges of your work area have been protected with tape to avoid resin staining.
The process of mixing and laying a Resin Bound driveway is simple but requires absolute accuracy at every stage to ensure success. Do not try to make shortcuts.
Step 1. How to mix the resin
The formulation of resin, mixed with dried aggregate, has been carefully designed to suit the requirements of the resin bound site. It is essential that the specified blend is not varied by the contractor. The process of mixing and laying is simple, but it requires accuracy and care at EVERY stage.
Do not take any shortcuts when mixing resin. You should generally only use one batch on a project – if more than one is required, take extra care to use the same batch in one area in case of slight batch-to-batch variation.
You should mix the resin in the container on a plasterer’s board or some other protective surface to guard against splashes.
- Make sure the resin container is secure (between your feet) before you start mixing.
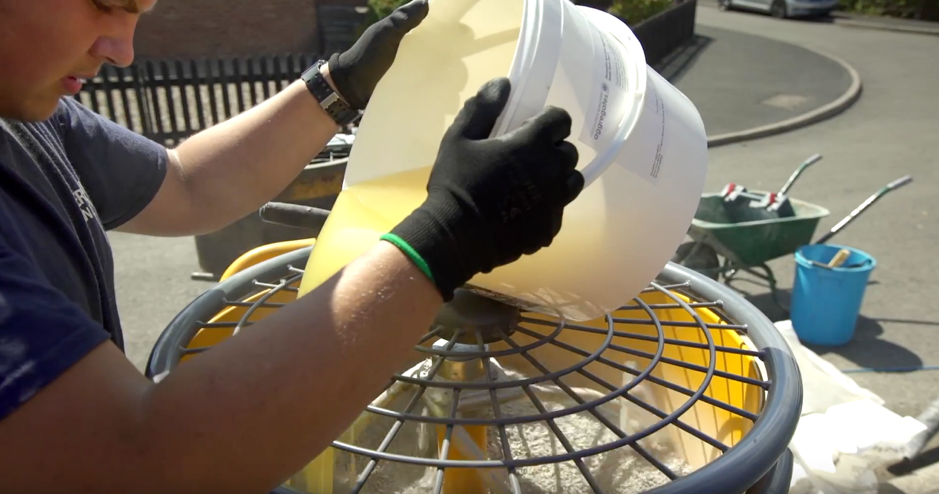
- The Part A component of the resin should be mixed for 10-20 seconds at a slow speed, using a high-torque, helical-bladed mixer. An accelerator should be added at this stage if required – see the next section for more details.
- The Part B component should then be added. Mix thoroughly at a slow speed for around 60 seconds until it is uniform.
How to change the curing speed
You should allow the surface to cure for around 8 hours, but we do not recommend foot traffic for at least 24 hours. If you wish to maintain curing speed, you may add an accelerator (also called a catalyst).
You must use an accelerator for temperatures below 15°C, especially when curing will take place overnight. Your accelerator should be used with each mix to make sure there is uniformity of curing. The only exception is for higher consistent temperatures of 25°C.
How much accelerator (catalyst) do I need?
The Part A component resin should be mixed for 10-20 seconds using a slow speed, high torque, helical blade mixer. Part B component resin should then be added and mixed thoroughly at slow speed for a minimum of 60 seconds until uniform.
While a small quantity of catalyst is included at the time of manufacture to ensure curing occurs, in many situations, a faster cure may be required, particularly in cold conditions. Extra catalyst can be added to accelerate curing as follows:
| Surface Temperature (°C) | Catalyst Addition Level (ml) |
|---|---|
| 5-10 | 3-5 |
| 10-15 | 2-3 |
| 15-20 | 1-2 |
Remember – Catalyst is added to Part A Base and mixed thoroughly before adding Part B Activator. Use catalyst consistently and not in random batches.
| Air Temperature (°C) | Accelerator (Catalyst) Addition level (per 6.5kg kit) |
|---|---|
| 17.5 | 4.4ml |
| 15 | 9.8ml |
| 12.5 | 16.6ml |
| 15 | 29.3ml |
Step 2. Mixing resin, dried aggregates and sand
The following should be carried out by the Mixer of your three-person team.
- Place one bag of 2-5mm aggregates and one bag of 1-3mm aggregates into your Forced Action Mixer.
- Add the pre-mixed resin to the mix and start your stopwatch.
- Add the two remaining bags of 2-5mm aggregates.
- Slowly add the bag of binding quartz
Steps 2-4 of the above instructions must be carried out for the same duration for every mix. Failure to do this will cause colour variation in the mix.
The mixing should take no longer than 4 minutes. Make sure the sand has been distributed evenly throughout the mix.
- When ready, empty the mix into your plastic-lined wheelbarrow.
- Switch the mixer off and ensure all of the mix is scraped from the mixer. The forced action mixer must be cleaned thoroughly after every mix to avoid contamination.
Important points to remember
- Make sure your aggregates are not damp prior to mixing
- You must mix for sufficient time to avoid any material being left uncoated
- Ensure every mix is the exact same duration
- Make sure the correct blend of aggregates is used
- Keep aggregates in the shade
Step 3. Transfer material to the work area
The following must be carried out by the Luter of your team, in tandem with the Mixer.
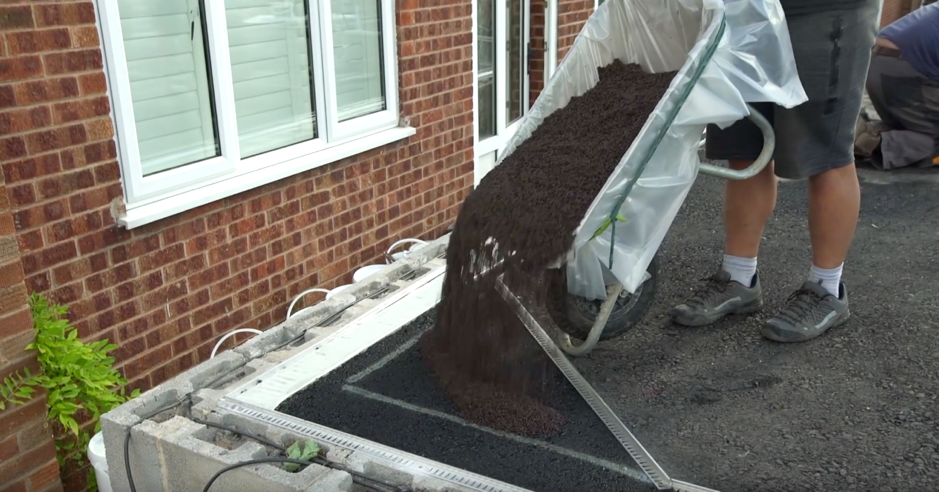
- The luter must take the mix over to where the troweller will work.
- Tip manageable quantities of the material, ensuring the mix is spread as evenly as possible. Too much material means more trowelling and working on the mix.
- Look at the surface that has been previously trowelled, checking for inconsistencies at every possible angle. Marks and anomalies can be easily fixed at this stage, but not later on after the mix has cured.
Step 4. Trowelling the material
The following must be completed by the Troweller of your three-person team.
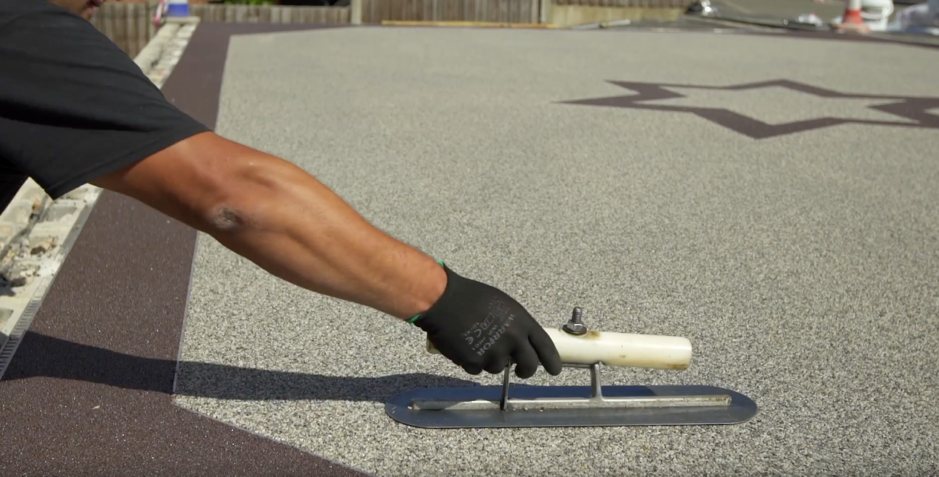
- Plan and Outline: Begin by planning the laying route. Use chalk to grid the area into squares.
- Mark Drop Points: Place batons to mark where the mixer should tip the mix.
- Even Out the Mix: Utilise a screed bar to further even out the mix before trowelling.
- Clean the Trowel: Trowels can become sticky from dragging aggregates, so always remember to clean them after use. We offer our specialist DALTEX Trowel Cleaner that makes this job quick and easy.
- Pack Edges: Ensure aggregates are packed into every edge to avoid gaps.
- Knit the Mix: Use the trowel with its edge slightly raised, applying consistent pressure to knit the mix together into a compact and level surface.
- Trowel the mix: Trowel the mix until the aggregates stop moving fluidly. Aim to do this in as few strokes as possible.
- Polish the Surface: Once levelled and compacted, polish the surface to create a uniform, smooth attractive finish
- Prepare for Next Mix: Leave the edge of each trowelled section rough and unworked for easy blending with the next batch.
- Add Slip Resistance: Sprinkle a light, even layer of crushed glass for additional slip resistance.
Helpful tip
To test whether the mix is compact and knitted. Cut a section into the edge of the surface being trowelled. It should remain intact. This is also a good way to check your trowelling depth is correct and consistent.
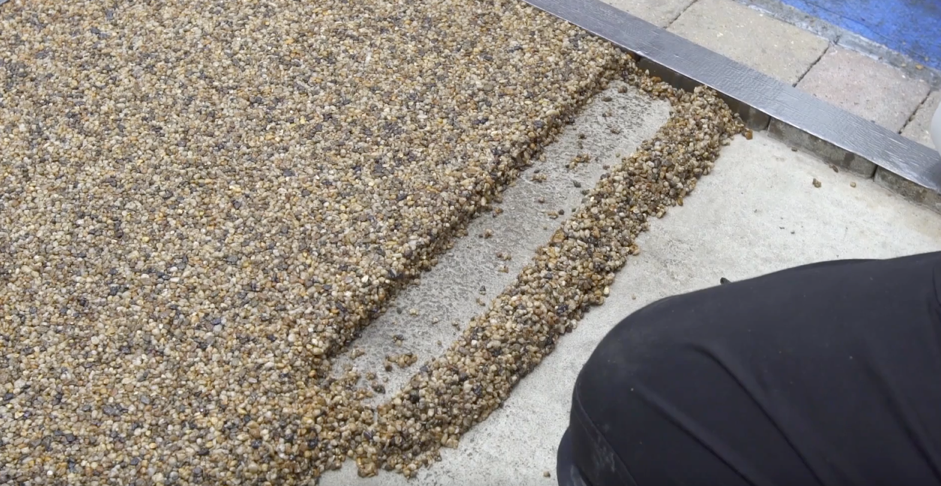
Once completed, mark the area clearly with cones and tape to prevent anybody from accidentally walking on the surface before it is ready.
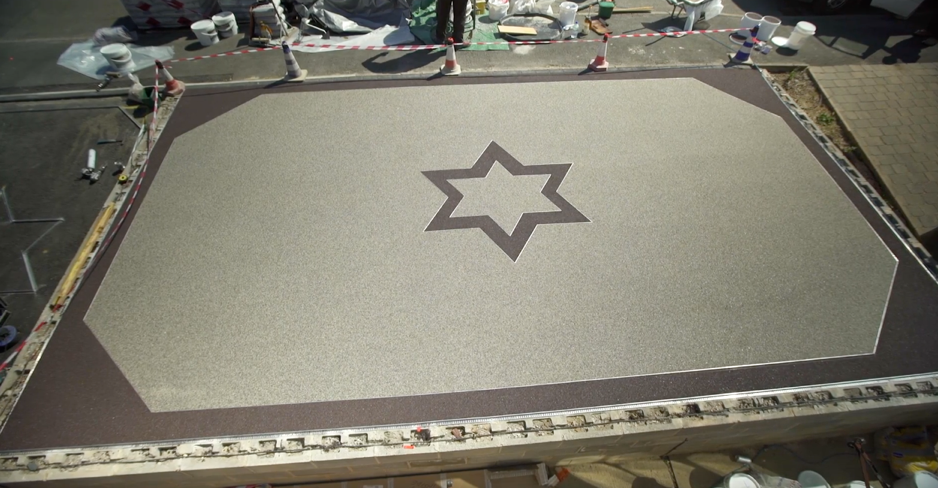
The finished Resin Bound driveway
It is very important that you adhere to these steps rigidly to prevent any variation in the installation. Consistency and accuracy are key to success in Resin Bound. The completed surface should be smooth, flat and, of course, stunning to look at!
Materials and equipment
Dried Aggregates
You can choose from a wide range of stunning aggregates in multiple sizes and colours. Your aggregates will determine the overall appearance of your customer’s Resin Bound driveway, so it is important to choose well! Samples are available for all customers and there is a sample case available for purchase to help the customer during the selling in process.
Resin
We recommend using UV-resistant resins for external applications, such as Resin Bound driveways. This will help prevent the breakdown and discolouration of the surface over time.
Forced Action Mixer
In order to mix your resin and aggregates, you will require a forced action mixer. We recommend the Baron F110 forced action mixer because it is strong and durable; with 110 litres of mixing capacity, it can accommodate the recommended DALTEX UVR system mix design.
Other equipment you will need
- Forced Action Pan Mixer
- Generator or power supply
- 110v transformer and lead
- Drill with slow start facility
- Whisk paddle
- Gaffer tape
- Resin trowel
- 5L /10L buckets, scrapers and a small paint brush for keeping the mixer clean
- Plenty of cleaning rags
- Wooden lute
- Knit wrist and latex gloves
- Clean wheelbarrow – polythene liners recommended
- Clean shovel
- Stanley knife
- Tarpaulins
- WD 40
- Gas burner and bottle
- Stiff brush
- Knee pads
- Disposable trousers
- Stopwatch
- Gazebo
- Hard Barriers, Cones and Warning Tape
- Beading if required
- Reflective Blankets (to cover stone and resin in hot weather)
Resin Bound training and assistance
If you would like to learn more about Resin Bound installations for driveways and other applications, Derbyshire Specialist Aggregates offers free text and video resources to assist you in these steps. For more information on Resin Bound systems, please see our comprehensive training notes.
We run highly-rated in-depth one-day Resin Bound training courses, presented by experienced independent contractors and a free online training course covering all the theories needed to install a resin driveway. Our training courses are informal, informative and practical. You can find out more and enquire on our Resin Bound Training page.
