Avoiding Common Problems with Resin Bound
When applied correctly, Resin Bound driveways give a long lasting, attractive finish that requires little to no maintenance. The bond between the resin and base is critical to the success of any resin driveway installation.

There are a number of things that can go wrong in the installation of a Resin Bound surface – we will highlight the most common issues and problems and advise you on how to avoid them. Common issues include unexpected rain damage, surface detachment or shading, reflective cracking and iron spotting. Find out more in our knowledge centre guide.
Unexpected Rain & Resin Bound
Water and resin do not mix; getting your resin or mixture wet at any stage of the resin driveway installation process can cause it to fail. If your Resin Bound installation is nearing completion and it looks like rain is on the way, here are some steps you can take.
- Raise a good quality 3 metre gazebo over the site
- Ensure resin and hardener are mixed in dry conditions
- Ensure the forced action mixer is kept underneath the gazebo
- Make sure all stone is covered with tarpaulin
If the rain is heavy and prolonged, or the job is not near completion – you should terminate the edge of the last laid mix to a neat line. This should be laid and finished at the correct depth for you to return and complete the following day.
Please note: a ‘day joint’ is still likely to be visible. It is likely that you will have to relay the surface.
Tip: Get a good, reliable weather app for your phone and plan ahead around the weather.

Resin Bound curing too quickly
Resin Bound mixture curing times vary by the ambient air temperature. Surfaces can cure very quickly in the height of summer. This is especially the case for black surfaces such as asphalt and tarmac; as a result, the resin can cure in as little as 10 minutes.
You should always aim to avoid encountering the issues caused by high temperatures in advance of your installation.
The installation should not proceed if:
- The relative humidity is outside the range of 30%-85%.
- The surface temperature is less than 3°C above the dew point of the measured air temperature and relative humidity.
- The operating temperature and road surface temperature and/or air temperature is outside the range 10°C to 30°C
For more information, please read our Resin Bound Training Manual.
Helpful tips to avoid temperature related issues with Resin Bound
- Start as early as you can before the warmest part of the day
- Keep resins in the shade at all times
- Do not store in your van – it may get warm inside
- Do not leave resin tubs in direct sunlight
- Keep aggregates out of direct sunlight too – these can heat up and increase the mix temperature.
Running out of Resin Bound gravel or resin
Running out of stock mid-way through a Resin Bound installation can be catastrophic for the overall project. It can delay your project and even cause problems with the final finish of your surface.
Here’s how to ensure you don’t run out of stock for your Resin Bound installation:
- Remember that coverage rates can vary according to aggregate type and accuracy in the depth of layering
- Always carry at least 10-15% more stock than the coverage rates you have calculated.
- Mark out the surface with line marker paint every 10 square metres. This gives you a simple reference point to check your usage and makes over-usage easier to spot early.
- This may also give you the opportunity to source more product before it is needed or to correct the over usage.
- You can use our Resin Bound Calculator to find out what quantities are needed for a specific area and surface thickness.
Resin Bound surface detachment
Surface detachment occurs when the top resin surface detaches itself from the sub base. This can be caused by a number of factors but is usually a result of frost or moisture if the surface has not been sealed correctly. It can also be caused when an unsuitable base is used.
Repairs for surface detachment are straight forward but will result in a mark where the patch of Resin Bound surface is cut out and replaced. It may be impossible to hide the colour variation between the new and old surfaces.
Walking on Resin Bound driveway before it has fully cured
Problems can occur if people (or animals) walk on the completed Resin Bound surface before it has fully cured. It will not yet have the strength to withstand that pressure and will therefore be damaged.
If the damaged area is accessible without walking on (and damaging) other areas, you should be able to re-trowel the affected area without hassle. Here is what you can do if an area is damaged before it has cured fully:
- Carefully chisel out the affected area (do NOT mechanically cut)
- Mix up a small amount of stone and resin/hardener.
- You can use syringes to measure out correct quantities of resin/hardener and postal scales to weigh out the correct amounts of stone.
- Carefully compact the new mix into the exposed area.
How to prevent people from walking on a Resin Bound surface before it has cured
- Clearly mark the resin driveway area with cones and warning tape.
- It is a good idea to take some photos of the area with the cones and tape in place
- Beware of household pets – cats are the worst culprits
- This is when the surface develops cracks over time due the base moving.
- If the base has moved and you have installed the base, then you will have to repair it.
- You should make it clear to the customer that if you have not put the base down then you aren’t responsible for any subsequent cracking.
How to ensure your Resin Bound mixes are consistent
Incorrect mixing of the resin will cause the material to fail. The mixer must monitor the efficiency of resin mixing by checking the empty tubs. After circa 30 minutes, they should scrape out the skin of the congealed resin from the first few tubs with a sharp tool. There should be no liquid residue between the skin of the resin and the base or sides of the tub. Repeat this check randomly at least once an hour.
- It is important to ensure that all of the mixes used on site are equal.
- All products are in pre-weighed bags of varying sizes to eliminate the on-site weighing of products.
- This can lead to having variations between the mixes and can give a stripy or patchy finish.
- One of the ways to avoid this is to mix up the bags off various pallets.
Tree root problems with Resin Bound
This potential problem needs addressing prior to the installation
- The best way of dealing with them is by discussing with the customer and understanding their preferences.
- Tree roots will always win in the end, so if it is decided that they are to be worked over, the customer needs to be aware that they will eventually cause disruption in the surface.
What is iron spotting with Resin Bound?
Some of the aggregates contain a natural occurring element of iron. If this is released from the mix it can cause a dark stain. There are, however, two different types of stains that can occur and require different methods to resolve.
Seek advice from Derbyshire Specialist Aggregates in the first instance. We will help identify the cause and remedial action needed.
 One of the ways to avoid this is either not to use the aggregate concerned or to ensure that a higher than normal resin content is used, as it has been found that in surfaces where a high resin content has been used then problems of this nature seldom occur.
Avoid surface clouding for Resin Bound
Surface clouding is caused by moisture dropping onto the surface before it is cured, as well as humidity in the air. Here’s how to avoid surface clouding:
- Avoid rain at all costs
- Wear a headband while working
- Avoid laying if humidity is outside the range of 30-85%
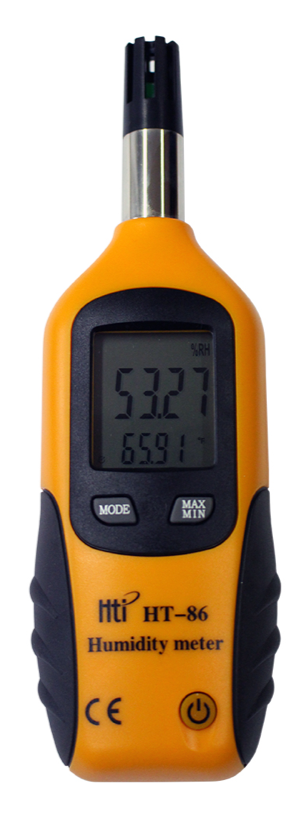
- Use a hygrometer if there is any doubt
Remember, you cannot remove these stains after the resin has cured, so prevention is paramount.
Loose stone in a Resin Bound surface
This can be caused by poorly mixed aggregates where insufficient resin has coated the stone, thereby causing the stone to not adhere to the mix and come loose. We recommend only a forced action mixer for a consistent, high quality mix. Cement mixers are not suitable for Resin Bound.
Ensure that ALL the mixes are mixed in the same manner for the same amount of time. If in doubt, use a stopwatch. You must also ensure the correct recommended mix ratio is always used.
Related to this
- Resin bound maintenance guide
- How to install a resin bound driveway
- Resin bound training courses
- How to conduct a resin bound installation site survey
- Understanding resin bound bases
Last edited: 10/09/2021
